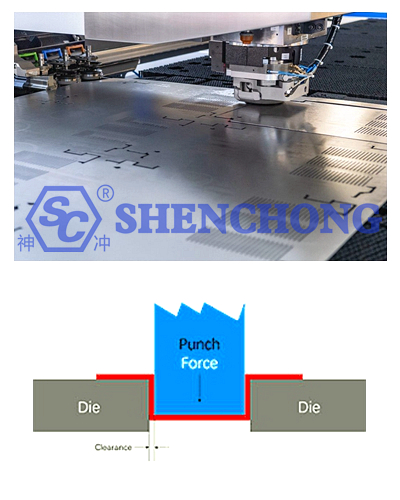
The design of the punch and die clearance not only affects the quality, production efficiency and cost of metal blanking parts, but also affects the life of the mold and the safety of production. Therefore, the reasonable design of the metal punching clearance is crucial to optimize the entire production process, reduce costs and ensure product quality.

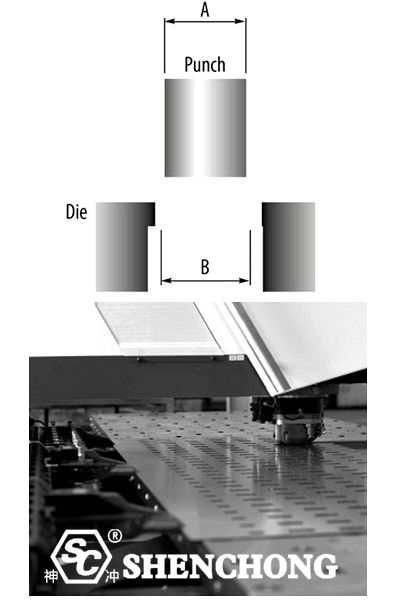
The metal blanking clearance refers to the distance between the punch and the die during the punching or cutting process. This clearance plays a vital role in the punching and trimming process of metal sheets. It directly affects the quality of the cut, the service life of the mold and the processing accuracy of the product.
The metal blanking clearance is usually designed according to the thickness and material of the metal sheet. The size of the clearance will have a significant impact on the smooth progress of the metal blanking process and the final product effect.
Appropriate metal punching clearance helps to obtain a smooth shear section and reduce burrs. If the clearance is too large, large burrs will appear on the edge of the metal punching. If the clearance is too small, the material will be stretched and deformed, and even cracks may occur.
A reasonable metal punching clearance can reduce the force during metal punching, thereby reducing mold wear and extending the service life of the mold.
By optimizing the clearance, the generation of waste can be reduced and the utilization rate of materials can be improved.
Usually, the size of the metal punching clearance is related to the thickness and material properties of the material, and is generally determined by a certain percentage of the material thickness.
Punch And Die Clearance = material thickness × clearance coefficient
Among them, the clearance coefficient is usually between 5%-10%, and the specific value depends on the hardness of the material and the design of the mold.
Click here to know more information about other clearance:
Punching Force Calculation And Molds Clearance

When designing the punch and die clearance, it is necessary to comprehensively consider the material properties, thickness, mold structure and precision requirements of metal punching. The following are some key steps and principles for designing the metal punching clearance:
The strength, hardness, toughness and other characteristics of different materials have different requirements for the metal punching clearance.
Soft materials (such as aluminum and copper): The clearance can be slightly smaller to obtain a smooth shear surface.
Hard materials (such as stainless steel): The clearance should be appropriately increased to avoid material breakage or excessive wear of the mold.
In general, the metal punching clearance is 5%-10% of the material thickness.
Precision metal punching: The clearance is small, usually about 5% of the material thickness, to reduce burrs and obtain high-quality shear surfaces.
Conventional metal punching: The clearance is slightly larger, generally 8%-10% of the material thickness, to extend the die life and reduce the metal punching force.
For punching that requires high precision, the clearance should be designed to be smaller to ensure the size and edge quality of the hole.
If the edge quality requirements are not high, or the hole size is not particularly strict, a larger clearance can be designed to extend the life of the mold.
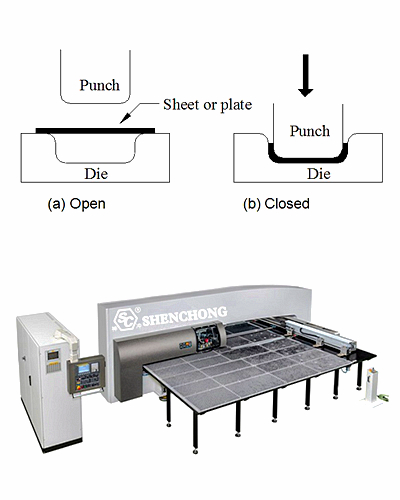
Shear metal punching: mainly relies on the shear force between the punch and the die for cutting. At this time, a larger clearance can reduce mold wear.
Drawing metal punching: A smaller clearance is required to ensure that the material will not break during the drawing process.
Metal punching clearance = t×k
t is the material thickness
k is the clearance coefficient, which is usually 5%-10% of the material thickness
For example, assuming that the material thickness is 1mm and the selected clearance coefficient is 8%, the metal punching clearance is:
Metal punching clearance = 1×0.08=0.08mm
Appropriately increasing the metal blanking clearance can reduce the metal blanking force, reduce die wear, and extend the life of the die. However, too large a clearance will lead to a decrease in the quality of metal blanking. Therefore, it is necessary to weigh the relationship between the clearance size and the life of the die when designing the die.
If the precision and edge quality requirements of the metal blanking parts are high, a smaller clearance can be selected. If the metal blanking parts are of medium precision and need to improve production efficiency and extend the life of the die, a larger clearance can be selected.
Through the above steps and principles, designing an appropriate punch and die clearance can balance the quality of metal blanking, production efficiency and die life.

First, confirm the thickness and material type of the sheet, which is the basis for clearance design.
Based on the material thickness and hardness, use a reference table or empirical formula to calculate the metal punching clearance.
The empirical formula is usually:
clearance = material thickness × (5%−10%)
Design the punch and die according to the calculated clearance value to ensure that the distance between the two meets the requirements. If quality problems occur during production, fine-tuning can be made according to actual conditions.
After the design is completed, it is usually necessary to verify the metal punching effect through actual metal punching tests. If problems such as excessive burrs or material rupture occur, the clearance value needs to be adjusted appropriately.
The punch and die clearance design of metal sheets is crucial because it directly affects the quality, efficiency and die life of the metal blanking process.
Reasonable clearance can ensure smooth shear section, reduce burrs and irregular edges, and improve the appearance quality of metal blanking parts.
Unreasonable clearance design (such as too small) will cause material deformation or even cracking, thereby affecting the shape accuracy and dimensional stability of metal blanking parts.
Appropriate clearance design can reduce the impact force during metal blanking, reduce mold wear and damage, and extend the service life of the mold.
As the life of the mold is extended, the maintenance and replacement frequency in production will be greatly reduced, reducing the maintenance cost of the mold.
Reasonable clearance design can reduce the risk of mold damage or jamming, reduce downtime caused by mold problems, and thus improve production efficiency.
By optimizing the clearance design, waste in metal punching can be reduced, material utilization can be improved, and production costs can be reduced.
If the clearance design is unreasonable, too much waste will be generated during metal punching, increasing production costs. By optimizing the clearance design, the amount of waste can be better controlled.
Reasonable clearance design can reduce the energy required in the metal punching process, thereby reducing energy consumption, which is particularly important in large-scale production.
Appropriate clearance helps to control the dimensional accuracy of metal punching parts, reduce the defective rate, and ensure the consistency and stability of finished products, especially in precision machining.
Unreasonable clearance design may lead to unqualified quality of metal punching parts and produce defective products. By optimizing the design, the defective rate can be reduced and the overall production pass rate can be improved.
Different metal materials have different hardness and ductility, and the metal punching clearance needs to be adjusted according to the material properties. For example, materials with higher hardness require a larger clearance to avoid material cracking.
In different metal punching processes (such as punching, blanking, shearing, stamping, etc.), the clearance design is also different, and must be optimized according to specific process requirements.
Unreasonable clearance design may cause sudden damage to the mold and increase safety hazards in the production process. Through reasonable design, mold failures can be reduced and production safety can be guaranteed.
The design of the punch and die clearance is a crucial part of the punching process, affecting the quality of the product, mold life, production cost and other aspects. Through reasonable clearance design, the ideal effect of smooth cuts, less burrs and durable molds can be achieved, while optimizing the metal punching process and improving production efficiency.